Where is it located?
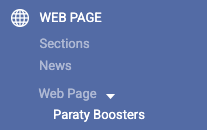
You can find it in the Back Office, under the Web page section.
Once inside, simply click Create new Pop Up and choose one of the available default templates to start working on it.

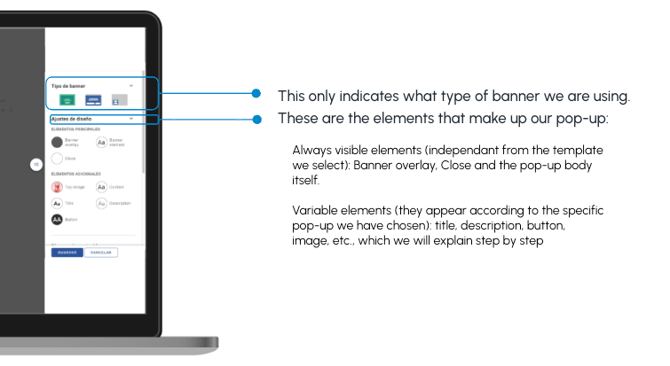
Once we've selected the pop-up we want to implement on our website or booking engine, we can start editing the template to our liking.
The most common type is the Vertical-Horizontal Pop-up (Side/Top picture with button). It will be located in the center of the screen, taking up about a third of it.
It's used for promotional campaigns like Black Friday or Valentine's Day, Club content, or for announcements such as "Closed for renovations" or "New facilities in our Spa," for example.
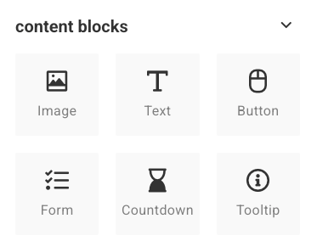
From the Content Blocks section, you can add the elements you need by simply dragging and dropping them onto the pop-up.
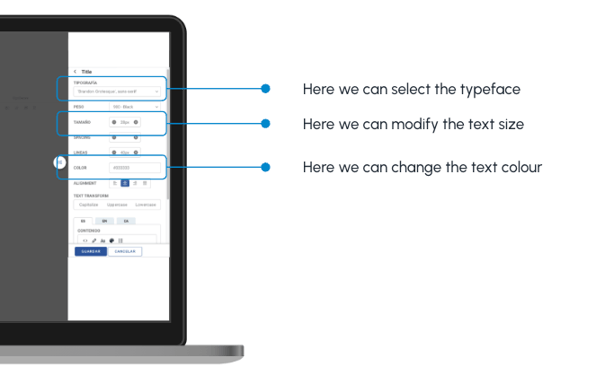
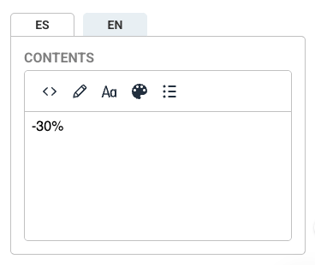
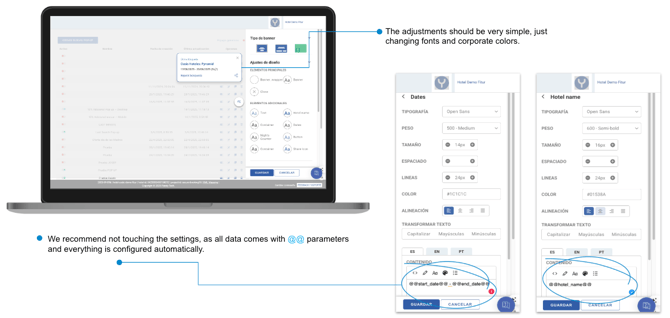
From the following panel, you can access the text content. If you click on Aa, you'll see more text tools, and by pressing B, you can bold the text you select.
To update the image, you must first upload the photo you want to include in the pop-up as content in the Sections area of the Back Office.
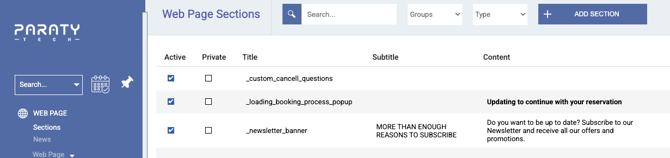
First, create a section called _extra_images which does not need to be active. Click on the Photos area and then click Add images. Upload the photo you want to add and wait for the upload bar to turn green and show 100%.
Once the image is uploaded, right-click on it and select Open in a new tab. You must then modify the URL: delete s=60 and refresh the URL by pressing Enter.
The resulting URL should look something like this:
https://cdn2.paraty.es/demo14/images/60a77a048c8cf56e563
In Paraty Boosters, click the pencil icon on the image and paste the URL into the Source field for all languages. Your photo will then appear in the pop-up.
Once you have made all the changes, click Save.
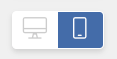
On the left, there are two buttons to switch between devices. If you click the mobile icon, you can adjust the content as needed.
Buttons, Links, and Functions
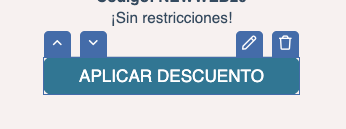
If you click the button's Edit pencil icon, you can access a panel with options to enter the URL you want it to redirect to. There are two main options, which we will cover next.
Link
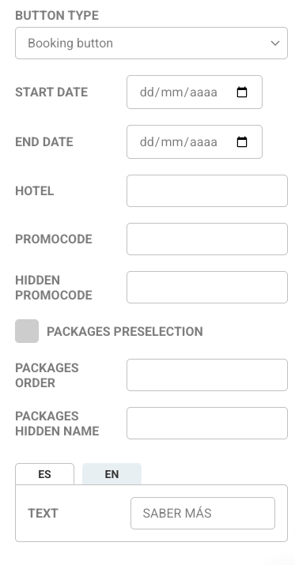
In the Text field, you should enter the text you want to display on the button.
By default, the HREF field will contain the Google URL. In this field, you must paste the URL you want the user to be redirected to when they click the button. For example, the URL for a landing page dedicated to a Valentine's Day campaign.

Booking Button
If you leave it as default, it will lead to the booking engine; in other words, the pop-up will close, revealing the booking engine widget.
This button has several customizable options: you can configure it with dates to show a predefined search, or you can set a promocode.
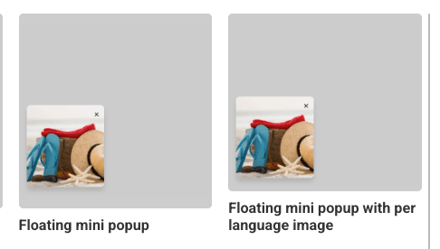
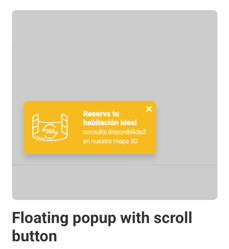
Floating
These pop-ups are used for specific communications, such as Christmas menus or cancellation insurance information. They are positioned at the bottom of the screen, and several can be active at the same time. Generally, the text is included directly within the image, so it's important to pay attention to dimensions and typography. A special type is the "Floating with scroll," which follows the user as they navigate and, when clicked, smoothly scrolls to a specific element on the page.
The tool also allows you to create Floating Notifications, which are messages that appear on the website to provide extra information. You can set their content type to "alert," "confirmation," "error," or "information" to adapt the visual style to their function.
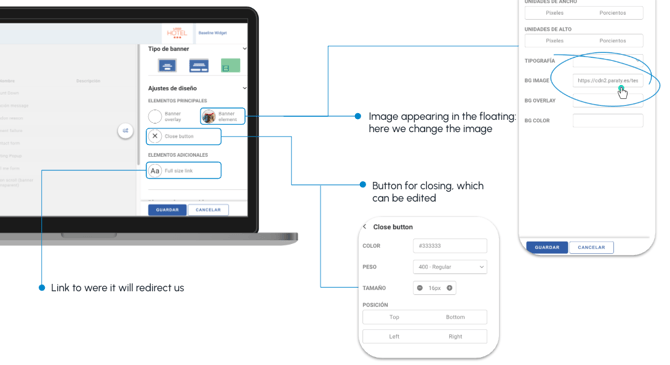
The floating pop-up also gives you the option to display another pop-up when clicked, making it possible to chain different pop-ups together.
This is useful, for example, for hiding a larger Vertical/Horizontal pop-up while still keeping the information accessible.

You need to create both the floating element and the pop-up within Paraty Boosters.
The pop-up must have two specific settings in its configuration:
- Timing: This must be set to "Event."
- Show only once: Add the name you will use to trigger it, for example, open_popup_eco_friendly.
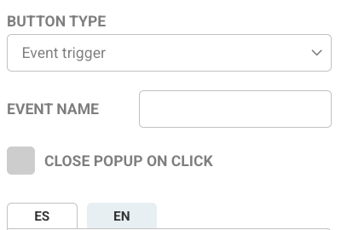
In the floating element's link settings, you need to configure the following:
- Button type: Set to "Event Trigger."
- Event name: Enter the name you assigned in the pop-up's configuration: open_popup_eco_friendly.

- Optionally, the floating element can be set to close on click (to enable this, leave the checkbox ticked).
Floating with Scroll
This type of floating element follows you as you scroll through the page.
It is used for information related to 360° views or for content you want to display with an icon that reveals more information when clicked (like club benefits or similar advantages).
When you hover your mouse over it, a dropdown with additional information appears.
If you click on it, it functions like a link but smoothly scrolls to the desired element. You can configure the scroll duration and offset.
It is located at the bottom of the screen (usually on the left).

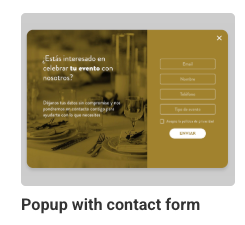
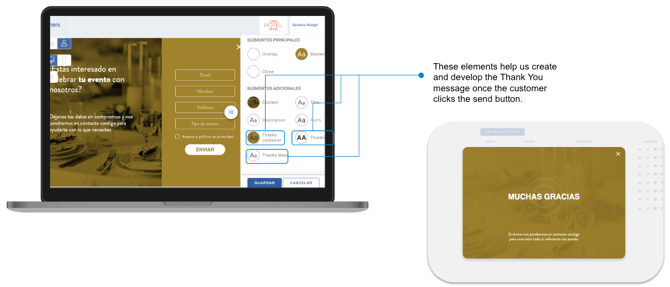
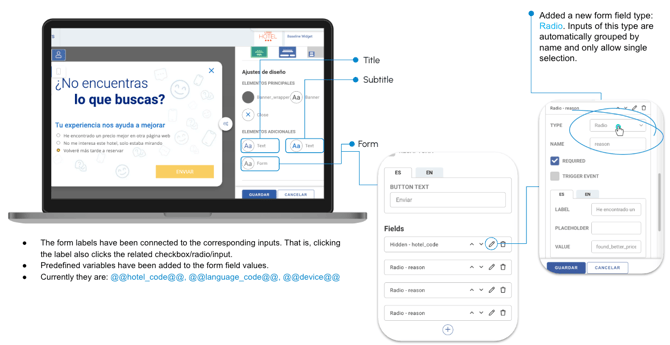
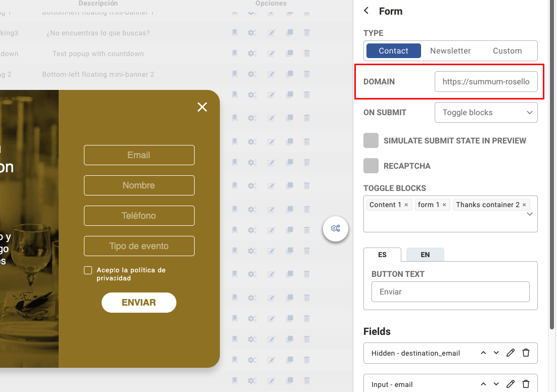
Pop-up with Contact Form
This pop-up is perfect for displaying a form that invites customers to submit their information, whether for a giveaway, an event, or something similar.
Just like the Vertical-Horizontal Pop-up, this one is located in the center of the screen, taking up about a third of it.
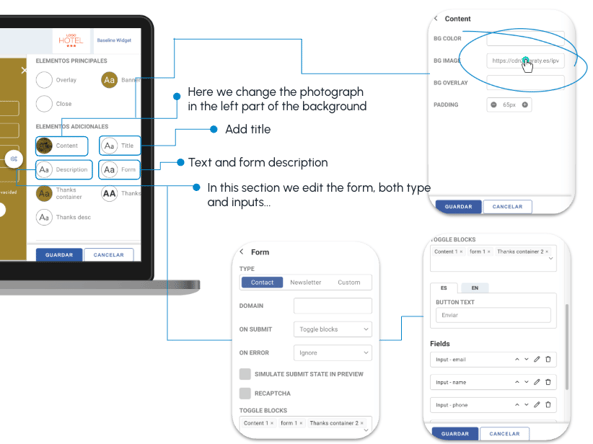
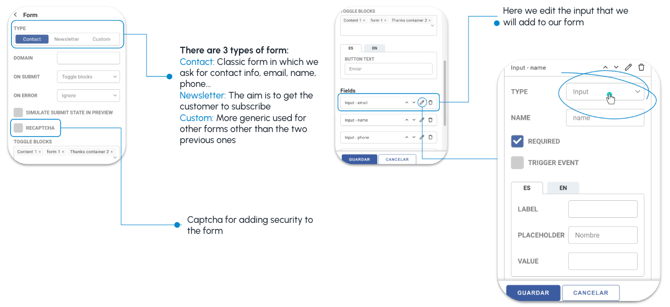
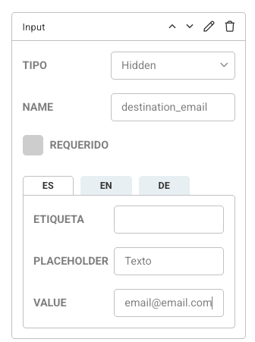
If you want to change the email address where the responses will be sent, you must add a new Input in Fields with the following:
- Type: Hidden
- Name: destination_email
- Value: The desired email address
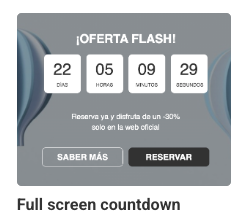
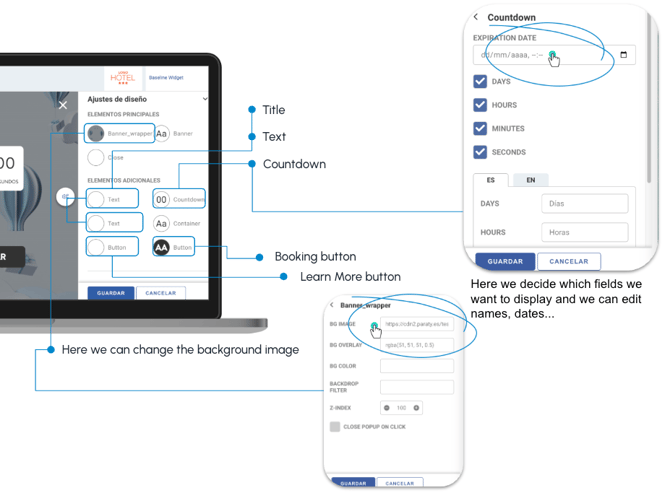
Countdown Pop-up
This type of pop-up contains a countdown timer, perfect for promoting offers, events, or news and generating greater curiosity and anticipation for the customer.
Abandonment Reason Pop-up
This is a pop-up that appears when a customer is about to close the booking process. It displays a form/questionnaire to help the hotelier understand why those customers are leaving.
It's a survey-style form with several possible answers, and selecting an option can trigger a chain of subsequent pop-ups.
The functionality is the same as the contact form pop-up; the only difference is the type of form created.
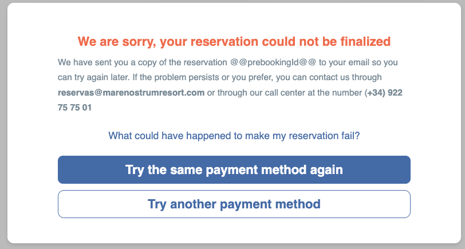
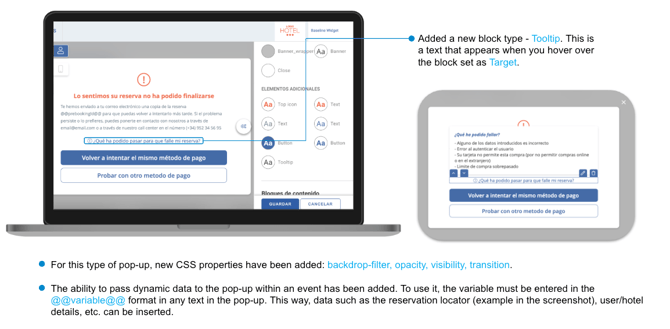
Payment Error Pop-up with Retry Button
In this case, there are two new pop-ups that will be displayed when the payment gateway fails.
How and when are they displayed?
Booking3: The first pop-up shown after a payment gateway failure will indicate that there is an error and that we can try again with the same payment method or a different one.
On one hand, it allows us to retry, or on the other, to try with a different payment method.
Booking3: After 3 attempts, a new pop-up will appear that no longer gives the option to try again. Instead, it indicates that the error persists and that a pre-booking email is being sent so the reservation can be completed later.
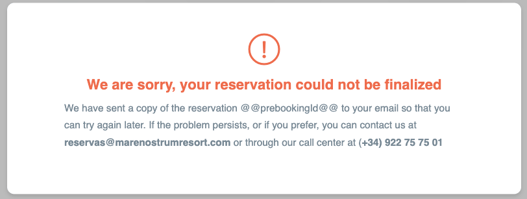
Pre-booking: We send a quote email, valid for 24 hours, containing all the reservation details, an assigned pre-booking code, and a link to Booking3 so the user can complete the reservation later.
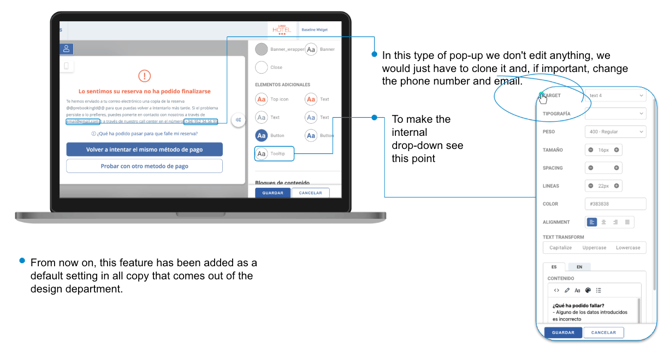
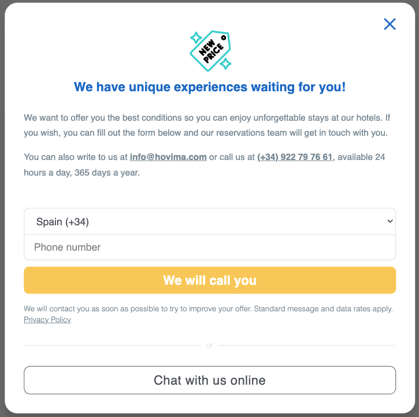
Retention Pop-up
This is a pop-up designed to keep the customer in the booking engine and encourage a sale by offering a "personalized" deal or a better price. It also provides a phone number for the customer to be assisted by an agent.
Just like the previous one, nothing in the template should be modified except for the phone number and email address in the main text.
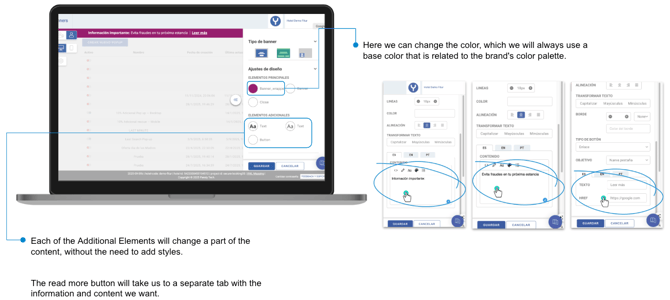
Header Pop-up
This is an informational pop-up. It's located at the very top of the screen and disappears once you scroll, so it doesn't interrupt website navigation.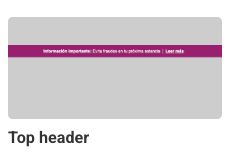
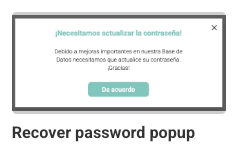
Password Recovery Pop-up
This is specifically for websites that require a password. It's used as a reminder when a password needs to be renewed.
In this case, nothing should be modified beyond the button and title colors or the fonts, to ensure it integrates with the client's styles.
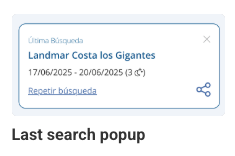
Recent Searches Pop-up
This pop-up appears after a search has been performed. It's especially for customers who are considering several different booking dates, serving as a reminder of their last search.
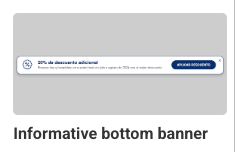
Footer Pop-up
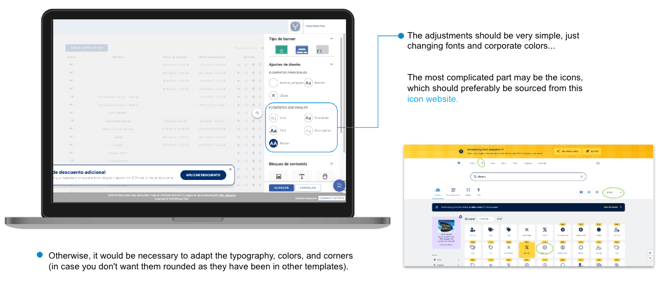
This is a new pop-up, very similar to the top banner. It's purely informational and has very simple settings.
It is located at the bottom of the website and follows you as you navigate. It can be closed if it obstructs the readability of any part of the site.
It's perfect for simple, direct offers or last-minute flash promotions.
Activate and Publish
Click the settings gear icon to access the following configuration panel.

Once the changes are saved, click the button on the left to activate it.
From the icons on the right (highlighted in blue), you can access the pop-up's settings, edit, clone, and delete options.
If you need a pop-up to appear only when visitors arrive at the booking engine or website from a specific external (or a specific internal) site, you must specify that site's URL in the "Referer" field in the configuration.
There is an option to customize the domain for contact and newsletter forms. By default, the current website (which may be a third-party site) is used, but this feature allows us to point it to our own internal URL.
An option has also been added to configure custom values in the Section Type and Sections fields. This allows for filtering by section or managing section groups, even if they don't correspond to anything in the manager.

Features
Have you ever wondered how websites decide when and how to show you a notice, a special offer, or an invitation to subscribe? The magic happens on a configuration screen like the one in the image. Let's break it down in a simple way!
![]()
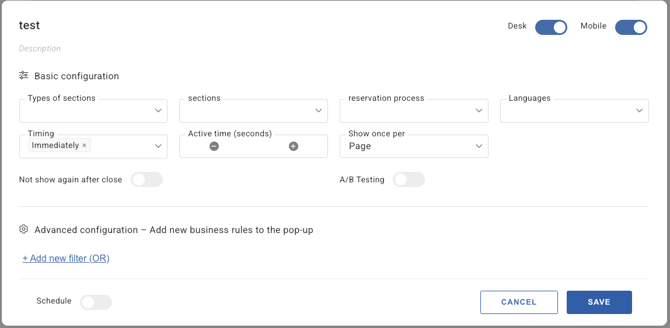
Step 1: Name and Description
First, give your creation a name (in this case, "test") so you can easily find it later. Then, you can add a description to help you remember what it does. For example, if it's an offer you want to display in a pop-up that only appears on Fridays in December.
Additionally, using the "Desktop" and "Mobile" buttons, you can choose whether your message will be visible on computers, mobile devices, or both!

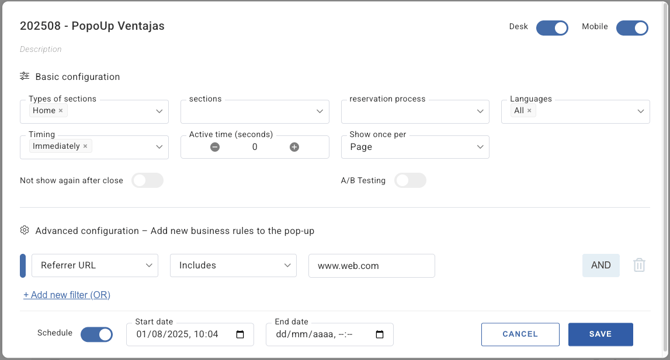
Step 2: Basic Configuration
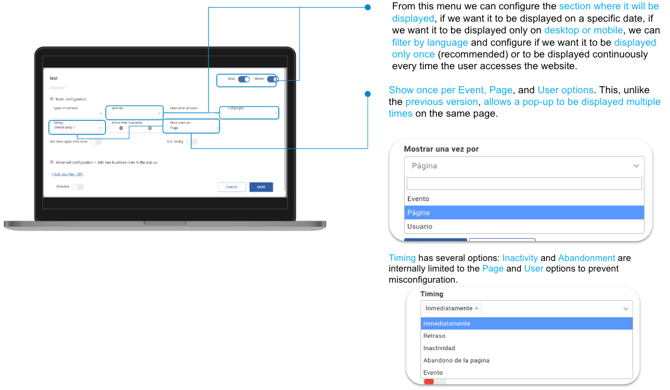
This is the section where the main behavior of the element is defined.
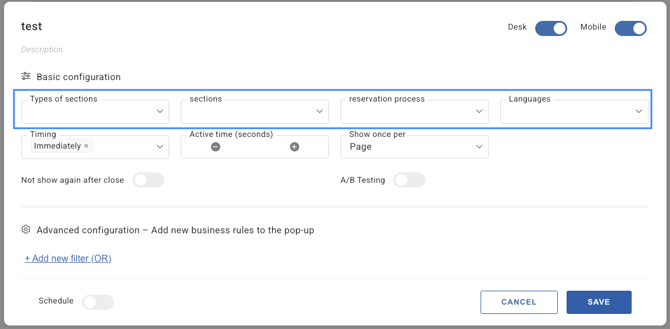
Defining Where and to Whom It's Shown:
The dropdown lists (Section Types, Sections, Booking Process, Languages) are very powerful filters. They allow you to be highly specific. For example, you can make a pop-up appear only on your blog pages, during a single step of the booking process, or only for visitors browsing in a certain language.
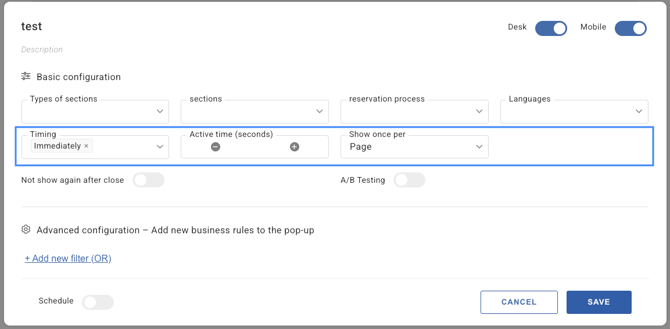
Adjusting Timing and Frequency:
- Timing: Here, you decide the exact moment the pop-up will appear. By default, it's set to "Immediately," but you can configure other options, such as on page exit (abandonment) or after user inactivity.
- Active time (seconds): This option allows you to set how long the pop-up will be displayed before it closes automatically.
- Show once per: A very useful feature to avoid overwhelming the user. You can set it to show only once per page, user, or event.
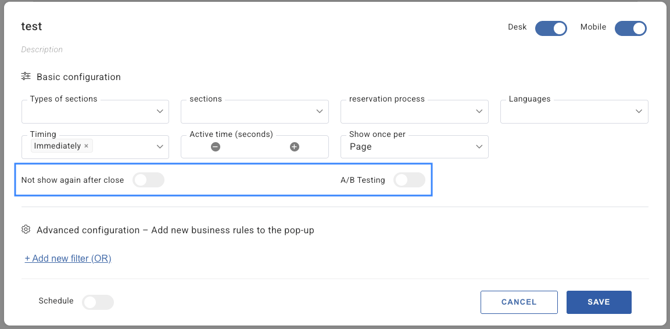
User Experience Options:
- Do not show again after closing: If you enable this option, you respect the user's decision. Once they close the pop-up, it will not bother them again.
- A/B Testing: This is a tool for experimentation. It allows you to create two different versions of your pop-up (for example, with different text or colors), and the system will show them to a percentage of users to see which one performs better.
Step 3: Advanced Configuration
If the basic rules aren't enough, the "Advanced Configuration" section allows you to add much more specific "filters" or "business rules." For example, you could set a pop-up to only display to users who have visited your website more than three times.
The filters can be configured so that all of them must be met (AND), or so that the pop-up appears if any one of the conditions is met (OR).
(AND):

(OR):

The filters are:
Related to user navigation:
- URL: Show the pop-up only on specific web pages. For example: www.yourwebsite.com/summer-offers. Regular expressions can be used.
- Referrer URL: Activate the message if the user comes from a specific website, such as a summer campaign landing page, a Facebook post, etc. Regular expressions can be used.
- URL Parameter: Activates if the URL contains the parameter specified in this filter. Ex: a UTM code. Regular expressions can be used.
Related to the booking:
- Availability: Show an offer only if there are (or are not) rooms available for the dates the customer is searching for.
- Check-in / Check-out date: Launch a notice for stays that begin or end on a specific date (e.g., "Book for Christmas and get a discount!").
- Nights: Offer something special based on the number of nights selected. For example, a pop-up with "Free breakfast on stays of 5 nights or more."
- Number of rooms, adults, children, or babies: Customize the message based on the specific search the customer initiates from the booking engine's search widget.
- Promocode: Display a notice if the user enters a specific promotional code. Regular expressions can be used.
Related to the user profile and time:
- User type: Differentiate between a club user, call center user, travel agencies, etc.
- Current date / Day of the week: Schedule offers that only appear when the user performs the search, for example, during the weekend or on a specific month or day.
- Cookie / Datalayer Variable: More technical options to segment based on the user's previous actions on the website that have been saved. Regular expressions can be used.
Other advanced options:
- Custom Configuration: Allows the use of any extra data passed to the tool upon initialization, especially for websites not built by Paraty. For example, a page can indicate the user type or other relevant data, and the system can then use that data for filtering.
Step 4: Final Actions
At the bottom, you have the final decisions:
- Schedule: With this switch, you can decide if the changes apply immediately or if you prefer the pop-up to activate (or deactivate) at a future date and time. This is perfect for planning campaigns. It may seem similar to the "Current date" option, but they are complementary. For example, I can have the pop-up scheduled for the entire month of October, but with the "Current date" filters, I can allow it to show only during the first and last week.
- CANCEL and SAVE: Finally, the action buttons. SAVE applies all the settings you have prepared, and CANCEL discards the changes.
In summary, this screen offers detailed and professional control to ensure that your messages are delivered at the right time, in the right place, and to the right person, improving the user experience on your website or booking engine.